3D-printable Laserlab

Build a 3D printed Laserlab, with which you can experiment in the realms of Special Relativity and General Relativity as well as Quantum Physics.
Description
Below, we present the main idea and setup instructions for building a 3D-printed Laserlab, designed for hands-on experimentation.
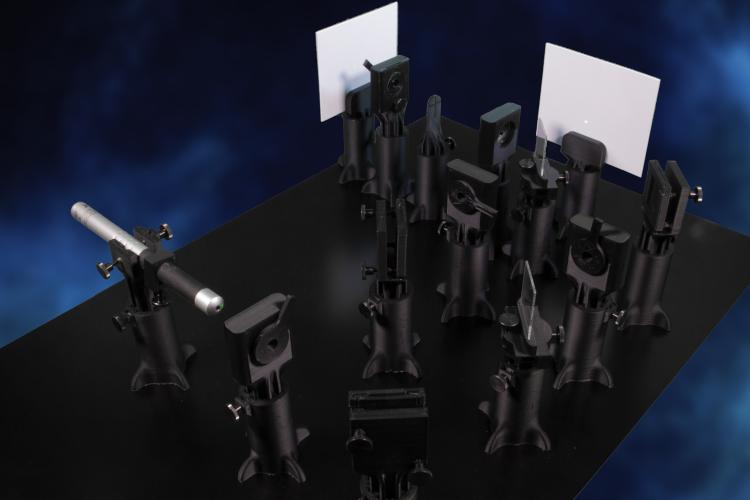
The Laserlab allows you to create experiments like those found in professional photonics labs but at a fraction of the cost. Using 3D-printed optical mounts and inexpensive components like screws, magnets and mirrors, participants can explore concepts such as the invariance of the speed of light, gravitational wave detection and quantum phenomena.
Laser technology is frequently used at CERN. Here, you can find a video of the ALPHA Experiment at CERN using laser light to cool down antimatter.
Material List
Here, we present everything you need for the setup. More information is available in the manual, downloadable from here.
- Assembly instructions as well as files for 3D-printing the optical mounts made of PLA plastic.
- 1 x steel plate (minimum size: 420 x 300mm, recommended size 600 x 400 mm).
- 1 x laser pointer (standard red or green consumer laser pointer. Coherence length critical).
- 10 x Neodym magnet (15 x 15 x 8 mm).
- 25 x Knurled screws (M3, length: 12 mm).
- 18 x nuts (M3).
- 2 x screen (e.g. piece of cardboard, approximately 10 x 8 cm).
- 3 x mirror (30 x 20 x 1 mm, front-coated).
- 2 x beamsplitter (40 x 30 x 1 mm, 50/50, non-polarising).
- 1 x lens (convex glass lens, diameter: 25mm, f=+45 mm).
The following items are optional, for advanced experiments:
- Arduino microcontroller (5V microcontroller e.g. Arduino Uno).
- Piezo speaker (diameter: 27 mm).
- 1 x light-dependent resistor module (27 x 13 mm).
- 1 x capacitor (1 µF).
- 1 x resistor (15 kΩ).
- 2 x splicing connector 2-conductor.
- 1 x mini-breadboard.
- Jumper wires.
Instructions
- Download and prepare all the material needed by clicking here.
- Follow the assembly instructions to set up one of the following experiments:
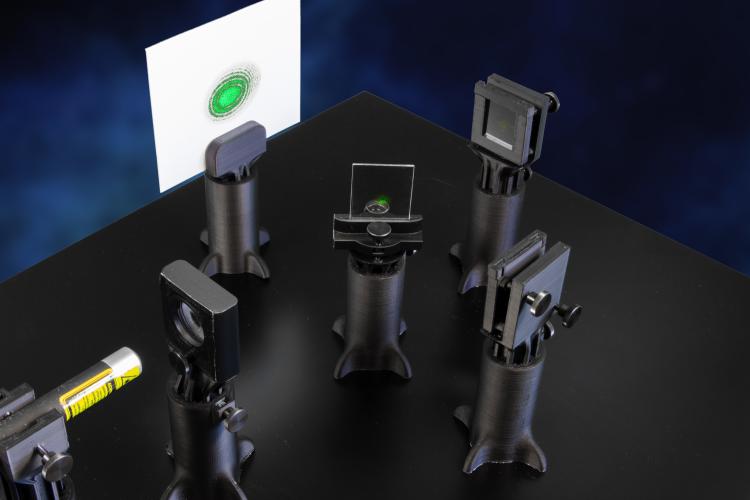
- Special Relativity, Michelson-Interferometer (basic) in manual: Set up a Michelson-Interferometer and test the fundamental hypothesis of Special Relativity: the invariance of the speed of light. This idea is at the core of highly counterintuitive phenomena such as time dilation or length contraction.
- General Relativity, Michelson-Interferometer (advanced) in manual: It’s only very recently that gravitational waves have been observed by gravitational wave detectors such as LIGO or Virgo. In essence, gravitational wave detectors are Michelson-Interferometers, which have been enhanced to greatly increase their sensitivity. Gravitational waves passing through these detectors will result in changing optical path lengths in the interferometer’s cavities and hence shifting interference patterns. The 3D printed Laserlab features a piezo-driven mirror that can be moved in the order of some 100 nanometers (ten-thousandth of a millimeter). This makes it possible to simulate the effect of gravitational waves and thus gain a better understanding of what is happening in large gravitational waves detectors.
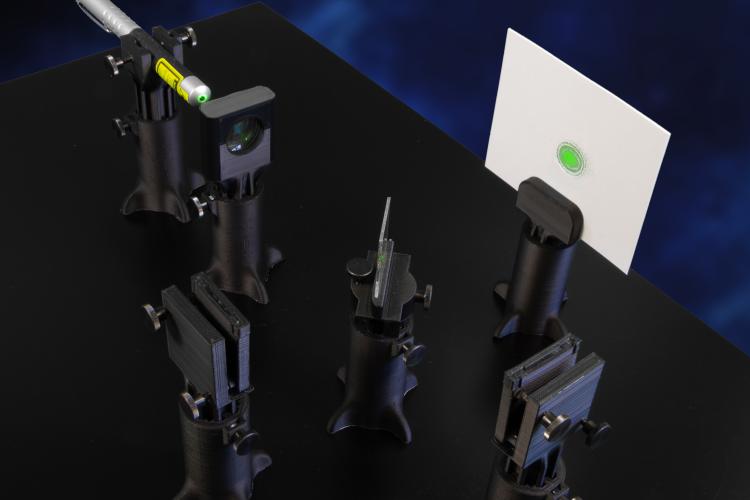
- Quantum Physics, Mach-Zehnder-Interferometer in manual: The Quantum World often seems very strange to the point of being barely comprehensible from a common-sense point of view. One of the stranger features is what happens during measurement and how the measurement itself affects what is being measured. A well-known experiment to explore the subtleties of Quantum Physics is the so-called “Quantum Eraser.” With the Laserlab, you can build one and explore the Quantum World for yourself.
- Assemble the lab and set up the experiment.
- Experiment and explore these scientific concepts!
Ideas for Educators
- You may also encourage students to build custom setups.